
Torsion Bar Adjustment: Step by Step Guide
Posted by admin at 31 October 2014, at 20 : 04 PM
So I got a call from a friend of mine telling me that he bought an old pick up that was “slammed”. The problem was, his chassis was too low to get in and out of its driveway, and we needed to fix it.
After a little research, we found that it was as simple as a torsion bar adjustment, so here’s a how to on adjusting torsion bars. One of the first challenge was getting the jack under the truck since it was so low, we actually had to jack up the wheel assembly first and slide blocks of wood under the frame to get it high enough to jack it in the right spot. After jacking it up and watching it wobble like a seesaw from front to back, we decided it was a good idea to toss in a jack-stand for safety.
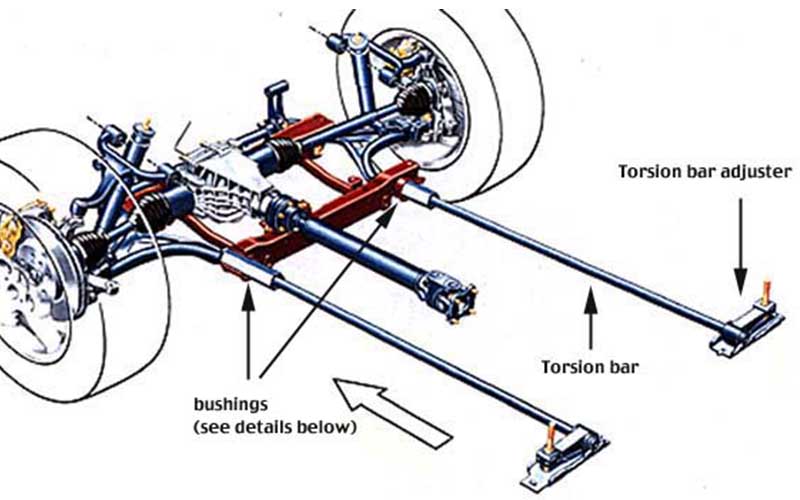
The two bolts next to the drive shaft are adjustable to change the ride’s height in the front. These are called torsion bars. There are two nuts on the top of it that you have to separate before you can adjust it. They act as a lock to keep it set into place. Once you get them separated all you have to do is loosen to lower or tighten to raise.
Start with one side and set the height where you think you might want it. Start small to see how far it adjusts per turn, and if you have an amount in mind, you should be able to get it pretty close. Drop the jack down and check it out, if it’s were you want it, then jack it back up and set the other side to match.
You can achieve this one of three ways. The best way is to measure the length of the bolt head to top edge of the torsion bar. Option two is to count the number of turns and hope for the best. The last option and the worst of all is eyeballing it — Dude you’re not that good! don’t bother, just measure it.
The last thing to do and probably the most important is to tighten down the second nut to lock it in place. Pull the jack out and you’re done.